How to Feed a Sourdough Starter
Since then, I have found that even though the process is a bit involved, once underway it’s not difficult.
Sourdough is the king of bread in so many ways, from flavor, to crunch, to the ease of digestion.
A true sourdough comes from an ancient bread baking technique that relies on a starter to provide leavening.
It produces a loaf that is nutritious, easier to digest than other types of loaves, and best of all delicious.
So let’s get into it – how to feed a sourdough starter:
What’s so Good About Sourdough?
 The taste of sourdough is wonderful, unbeatable and unique when it comes to the choices of bread on the market.
I am particularly fond of the very sour, tangy, chewy sourdough bread that is made without any added yeast.
Sourdough has a natural acidity that keeps bacteria away, meaning it stays mold free longer than yeasted bread.
The lactic acid also allows for better nutrient absorption giving you a much healthier food to eat.
Why Isn’t all Bread Made of Sourdough?
All bread used to be made using this method before yeast was discovered as a living organism.
At that point the baking process was sped up making it possible to control the timeframe of bread production.
The thing that keeps more people from making sourdough bread is mainly the time required to make it.
Not only do you need to make your starter (which you can also buy), but you need to feed and maintain your starter.
It is true that making a starter from scratch is a bit time consuming, requiring at least 5 days.
Also, the rising process will be much longer depending on the strength of your starter.
And yes, this kind of bread will need much more time to rise given the natural yeast it is relying on.
But it is an easy process and one that when followed properly will give you wonderful bread forever.
With a starter in the refrigerator you will always be ready to bake sourdough bread that will be robust in flavor.
Let’s dive in, and I’ll show you how to make and feed a sourdough starter from scratch.
What is a Sourdough Starter?
Before we learn how to feed a sourdough starter, we need to know what it is!
A sourdough starter is the part of your dough that will have gone through a fermentation process which will allow your dough to rise.
Normally begun by using whole wheat flour, or rye flour and water, loosely covered and left out at room temperature.
This will allow for natural occurring yeasts to feed on the flour and begin the fermentation process.
During this process it is important to cull your starter at the same time as feeding it.
Do this for a few days until the starter has the ability to sustain the fermentation without being fed once a day.
Starters can last a very long time if they are well taken care of and fed regularly.
This means that whenever you use some of your starter, you feed it so it continues to grow.
No one knows how old the oldest existing starter is, but in my research I found one in an article from 2011.
A woman in New Castle, in the UK, is looking after a starter that was 122 years old at the time.
Who knows if it is still around today, but as you can see a good starter can become a family heirloom!
Passed down from generation to generation, providing nutrition and sustenance for years.
Start yours today!
Exactly What is a Sourdough Starter Doing Anyway?
When you make a sourdough starter, know it or not, you are creating a culture of microorganisms.
These microbes appear as if by magic but they are actually in the air, the flour, your hands, your jar; everywhere.
One of the things I find fascinating, and it does make sense from an evolutionary perspective.
Is that the microbes you end up with in your starter will be the strongest around.
Natural selection plays a part in getting you the best microorganisms that are vying to be part of your starter.
When flour and water are mixed together, the starch in the flour begins to change into sugar.
This sugar is the right food for your new found microbes to eat.
As these organisms dine on the sugars in the flour, the byproduct is lactic acid, helping create the sour taste.
This of course is a simplistic overview of the whole process, which is rather complex, however, it delivers lovely bread!
How to Make a Sourdough Starter
When making a sourdough starter it’s crucial to follow the process carefully.
It is important you get the best chance of creating a starter that will be long lasting.
This method allows the wild yeast in the air and on the whole wheat flour begin to feed on the additions of fresh flour.
Once you have a starter that has come to life, add flour and water on a regular basis.
Keeping your starter healthy and happy is the ultimate goal with this technique of baking bread.
That is all there is to it.
See the recipe below for a step by step guide.
How to Use a Sourdough Starter
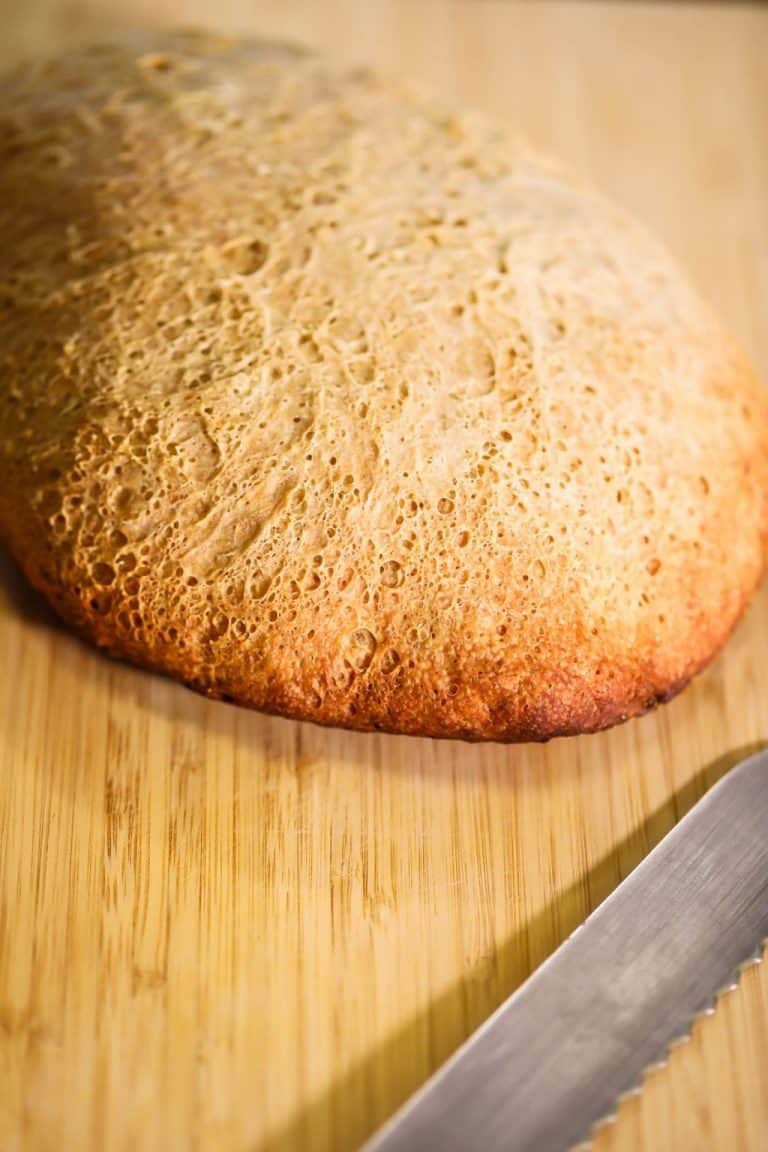
 A sourdough starter can be used as the sole leavening agent for your bread without the addition of any additional yeast.
This method will provide you with a very tasty, crunchy loaf of bread.
The only catch is that it can take up to 24 hours to get your loaf!
Nowadays, it is common that a bread recipe calls for an addition of yeast along with the starter.
This speeds up the process while giving the loaf a sourdough flavor.
In this case the starter will act more as a flavoring agent as opposed to leavening of the bread.
Where to Buy Sourdough Starter
I haven’t found any supermarket yet in the States that sells fresh sourdough starter.
However, King Arthur Flour sells a really great 1oz pot of fresh sourdough starter.
Otherwise this live sourdough starter from Breadtopia is a great way to start.
Read on below if you want to make your own, and learn how to feed a sourdough starter.
Sourdough Starter Recipe
DAY ONE
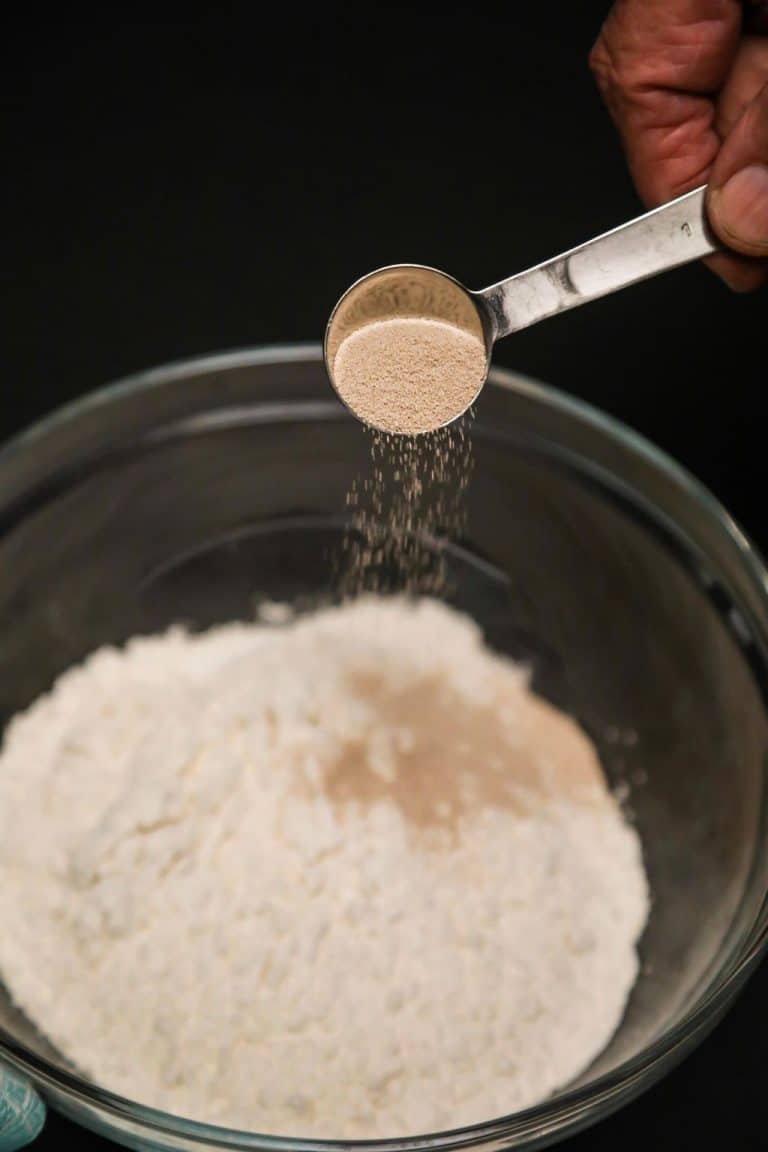
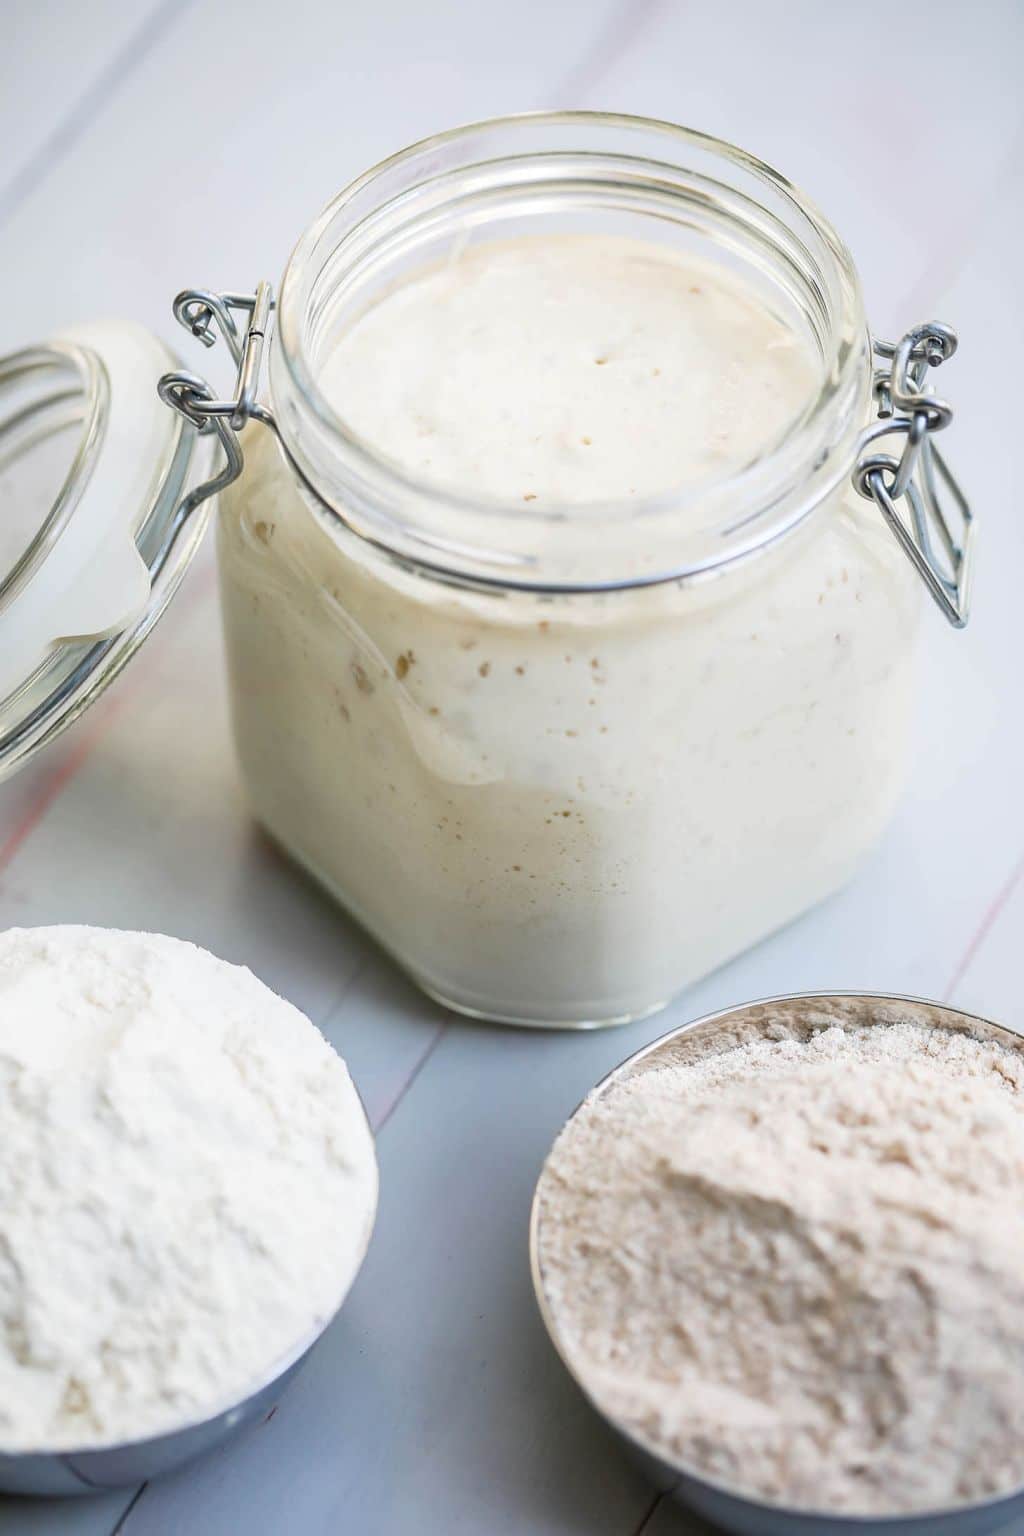
- Mix a cup of whole wheat flour with half a cup of water at room temperature.
- Ideally put it into a quart size glass container, cover loosely, and leave on the counter at room temperature for 24 hour.
DAY TWO
- Remove all but four ounces of the starter from its container.
- Discard removed starter.
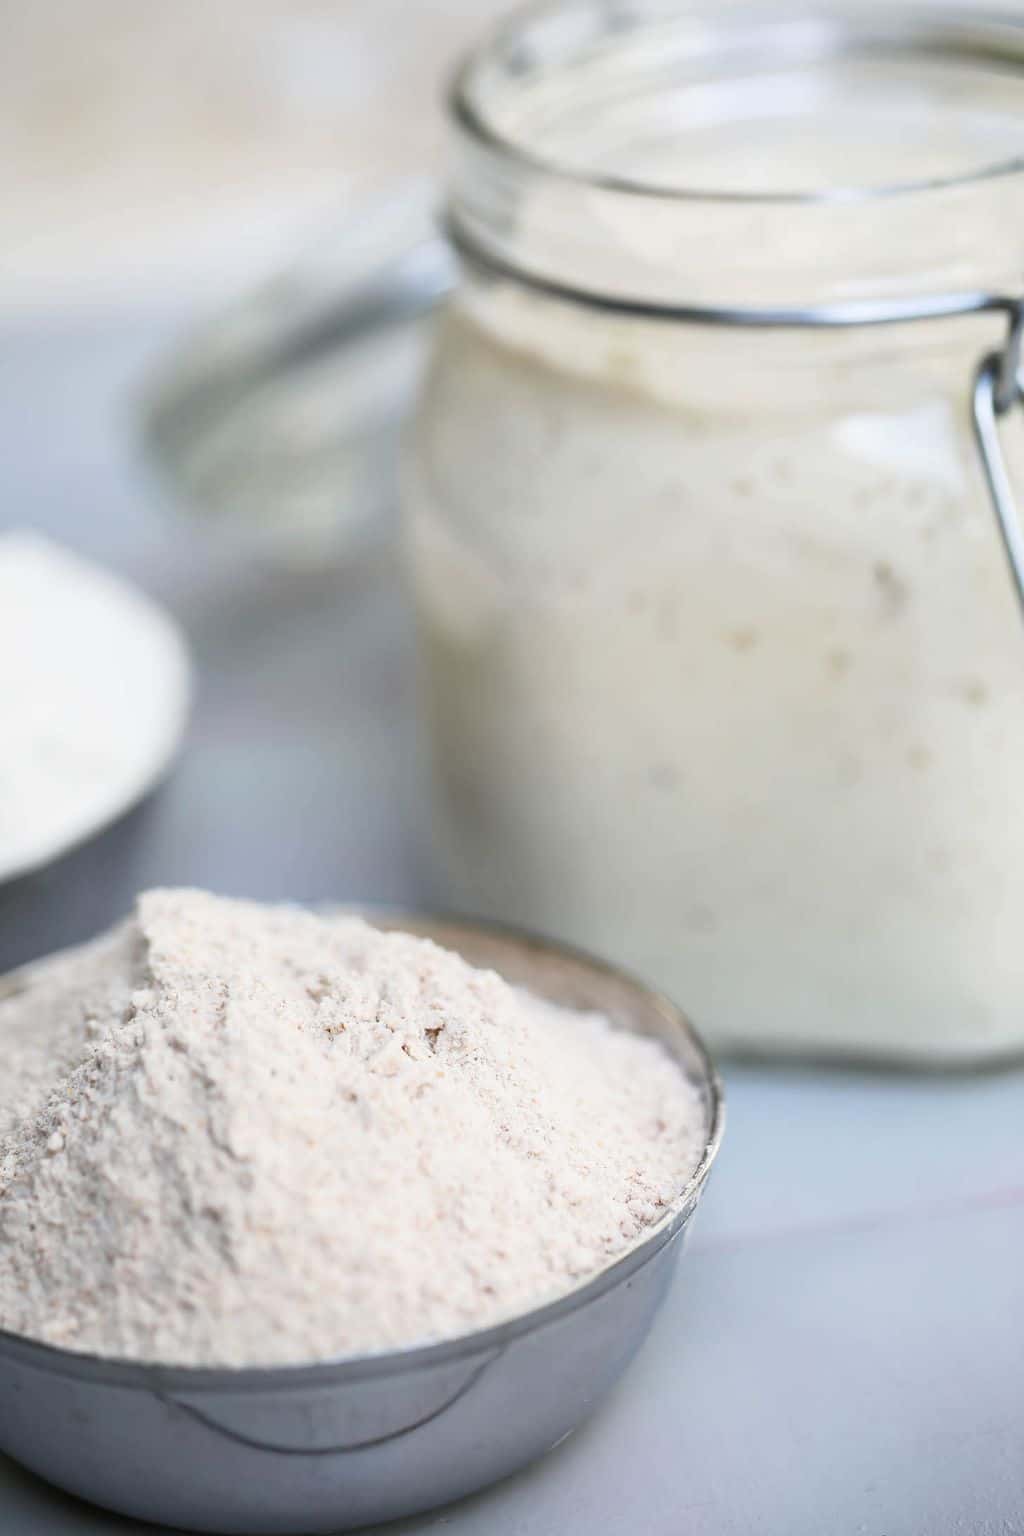
- Add one cup of unbleached all purpose flour along with half a cup of water to the 4 ounces of starter.
- Stir until all the flour is absorbed.
- Cover loosely and allow to sit at room temperature for another 24 hours.
DAY THREE
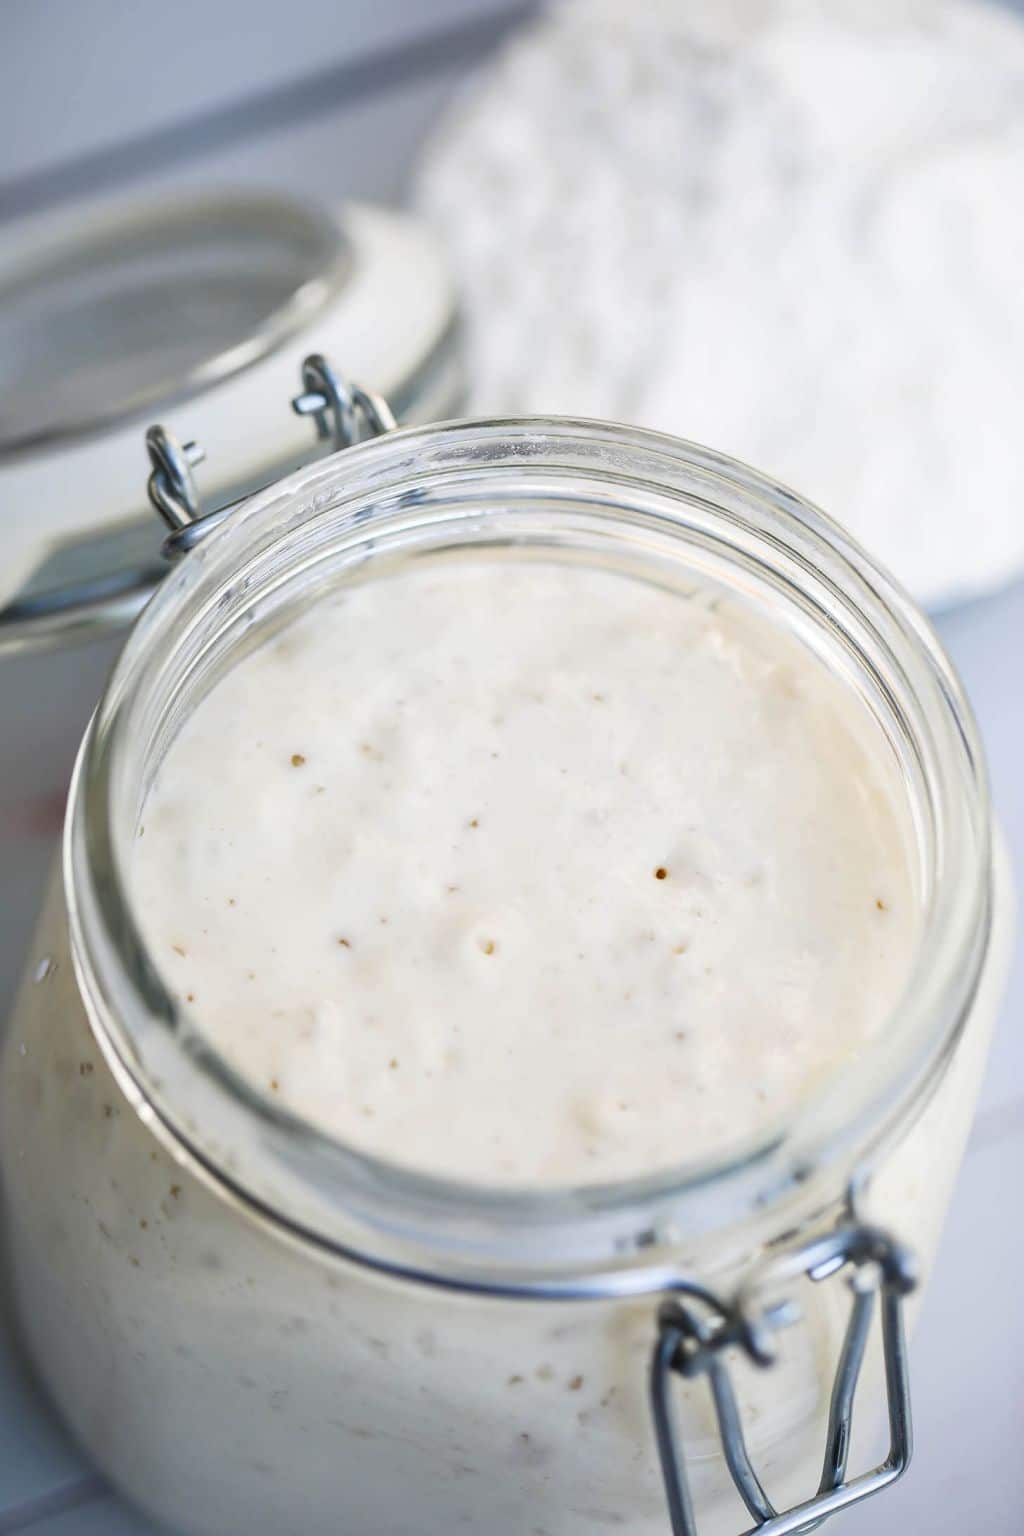
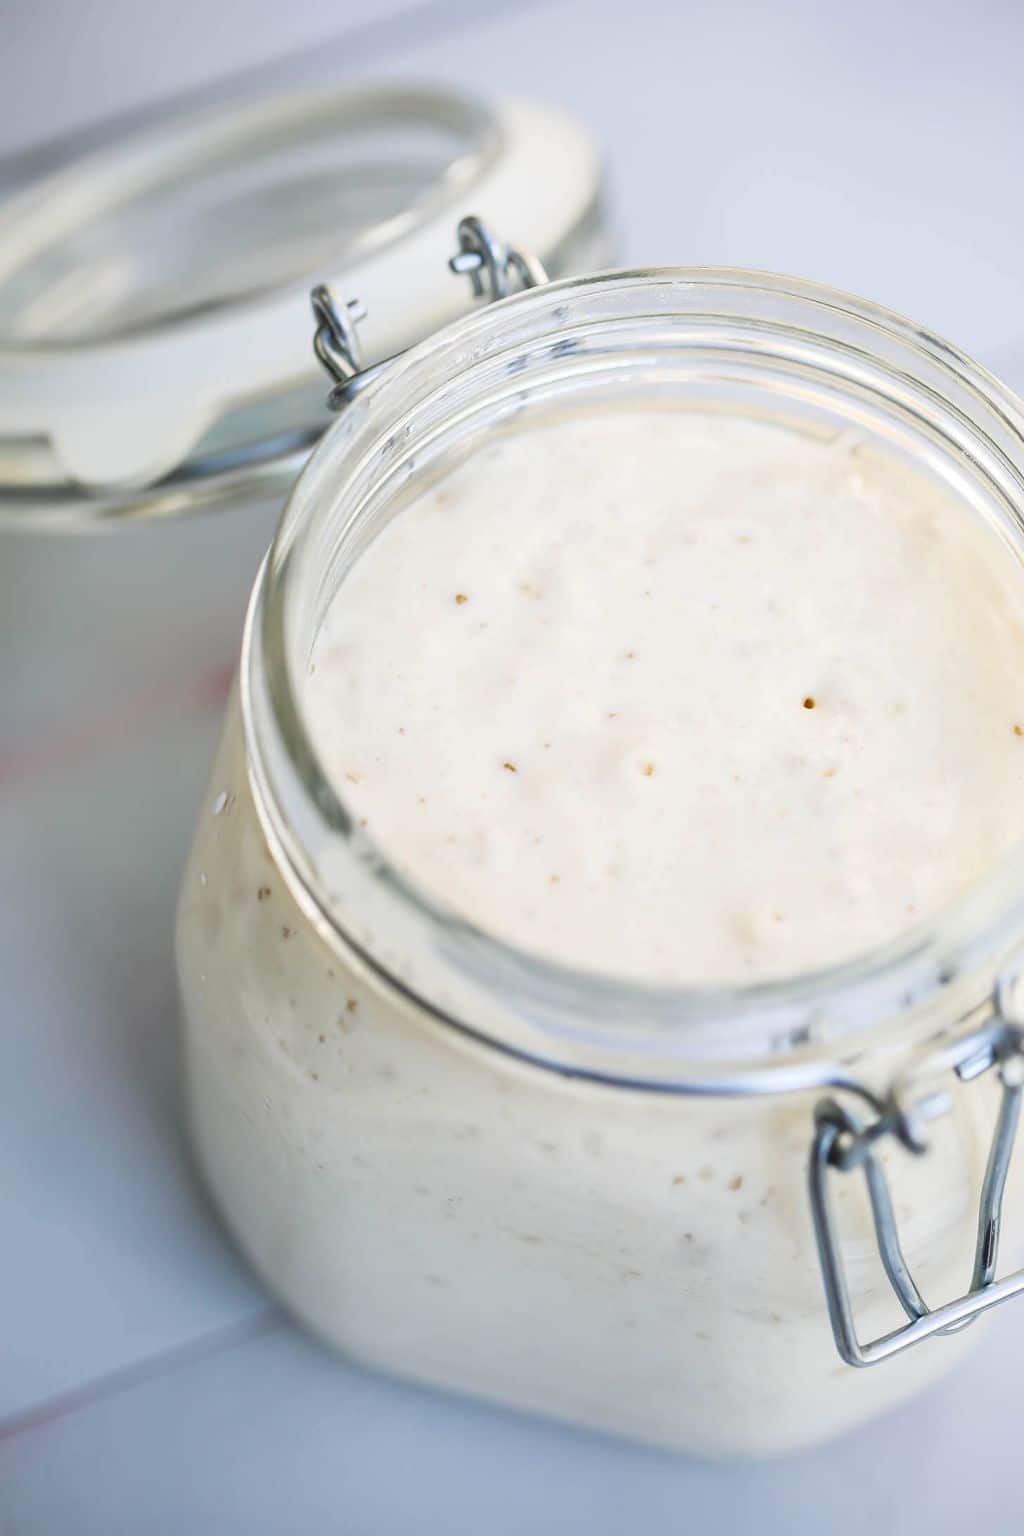
- You should start to see some changes to your starter in the form of little bubbles, and a very distinct aroma.
- You will see that your starter has started to stretch and grow.
- Once again weigh out 4 ounces of the starter and throw away the rest.
- Add one cup of all purpose flour and half a cup of water to the starter and mix until all the flour is absorbed.
- Cover loosely and leave at room temperature for 12 hours.
DAY FOUR
- Time to feed twice a day.
- Just as before, remove all but four ounces of the starter and discard the excess.
- Add 1 cup all purpose flour and half a cup of water to the remaining starter and mix until all the flour is absorbed.
- Cover and leave at room temperature for 12 hours.
- Remove 4 ounces of starter and discard the rest.
- Add 4 ounces of starter to 1 cup all purpose flour and half cup water and repeat process as above.
- Leave for 12 hours.
DAY FIVE
- Repeat the feeding as above.
- Leave for 12 hours.
- By the end of day five you should see a lot of changes to your starter with a lot of evidence of bubbling and expanding.
- Feed one more time by discarding all but 4 ounces of the starter, and adding 1 cup of flour and half a cup of water.
- Mix until all the flour is absorbed.
And that’s it, and generally the way most sourdough recipes with starter flour and water go.
Your starter is now ready to use.
Maintaining a Sourdough Starter
So, how to feed a sourdough starter…
As you can see having a sourdough starter requires a certain dedication to keeping it healthy and happy.
This is very important if you want to be able to depend on a strong starter to give you a good loaf everytime.
The good news is that you can get away with feeding your starter once a week, and generally have something worthwhile to rely on.
There are people who feed several times a week, everyday, and in some cases three times a day!
I don’t need to get to that point, but it is really up to you to decide how often.
Another factor will of course take into consideration how often you bake bread as well.
What is Sourdough Hooch?
When referring to something called hooch, you will be speaking of the liquid that collects on top of your starter.
This liquid will begin to collect if your starter is underfed, and will not necessarily mean that it’s in trouble.
As wild yeast ferments, it will cause alcohol to accumulate, where it gathers on the top of your starter.
This is definitely a sign that you should feed your starter right away.
How to Best Store a Sourdough Starter?
The answer will depend very much on how often you bake sourdough bread, and how often you will be using your stater.
The two main ways to store your starter are either on the countertop, or in the refrigerator in covered containers.
If your starter is stored on the counter that would tell me that you are probably somebody who makes your bread often.
It will need to be fed more often, but will be available at all times when you are ready to bake.
If you keep it in the fridge then you are probably someone who bakes your bread less often.
However, in the fridge, your starter will need feeding less often, and will need to warm up before using.
For long term suspension of your starter, you also have a couple of different options.
One is to dry your starter by spreading it thinly on a piece of parchment paper until it dries out and becomes brittle.
It can then be broken up into small pieces, and kept in an airtight container until you are ready to bake again.
To reconstitute, place about a ¼ cup starter in about a ¼ cup lukewarm water, then add about ½ a cup of white flour.
The other long term solution for storage is to freeze your starter until you need it again.
Simply put the starter in a freezer safe container, or thick plastic bag, and place in the freezer.
To bring it back to life, place the frozen starter in the fridge overnight until it is thawed, then feed as you would normally.
Leave it out on your counter until it is regenerating itself as it did before being frozen.